
Have you ever been curious about the inner workings of video streaming and how you can leverage AWS media services to create one. A stream of your own?
Lets create a video stream from a local machine to understand the process and how to use AWS Media Services for video streaming. This article will explain how to create a video stream using AWS Media services.
Tools we will be using:
What we need:
- A machine to run FFmpeg
- A video file
- VLC Media player (or any network streaming tool)
4. Video Streaming Overview
In this article we will be using a downloaded video file but you can also use any live camera feed directly into stream to show live feeds.
Let’s Start!
STEP 1
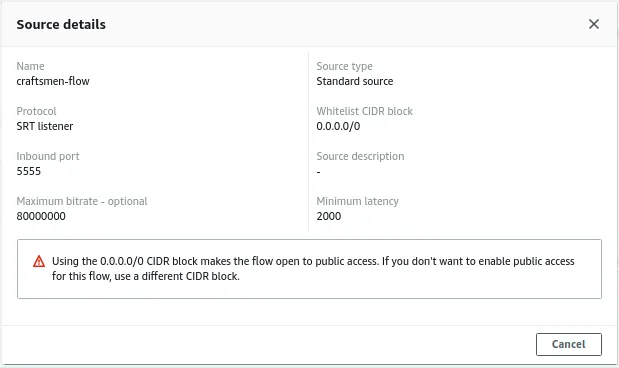
Go to AWS Elemental MediaConnect in console and create a new MediaConnect flow with below settings-
AWS MediaConnect Source Detail
Here we are using 0.0.0.0/0 (this is not recommended; you should always use your public ip/range) CIDR block to make the flow publicly accessible for this article. We are using SRT Listener. To know more about SRT click here. We will be using inbound port 5555 to connect to this flow. After creating start the flow.
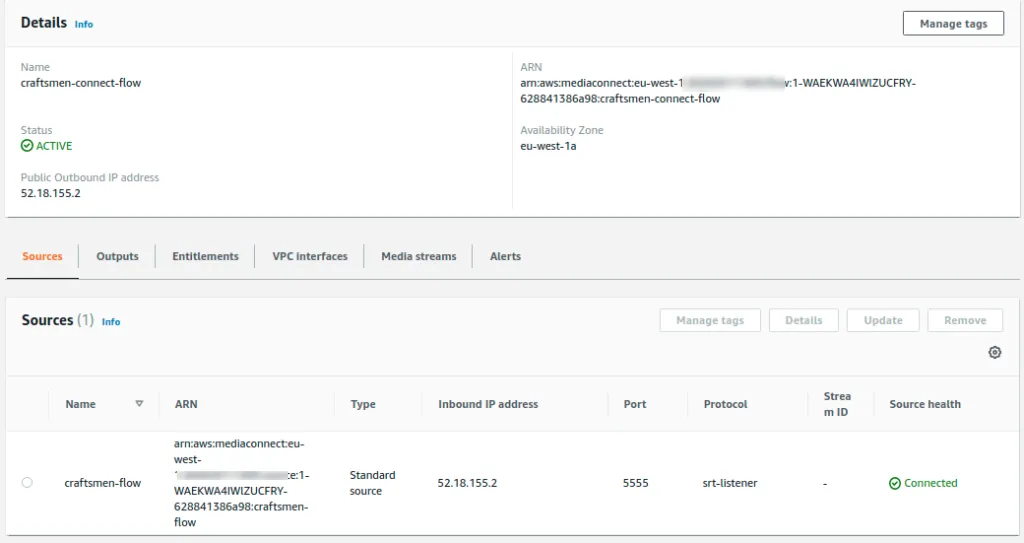
A MediaConnect Flow with IP: 52.18.155.2 and Port: 5555
STEP 2
Now, Before Creating a MediaLive channel we need to create an IAM role and MediaLive input.
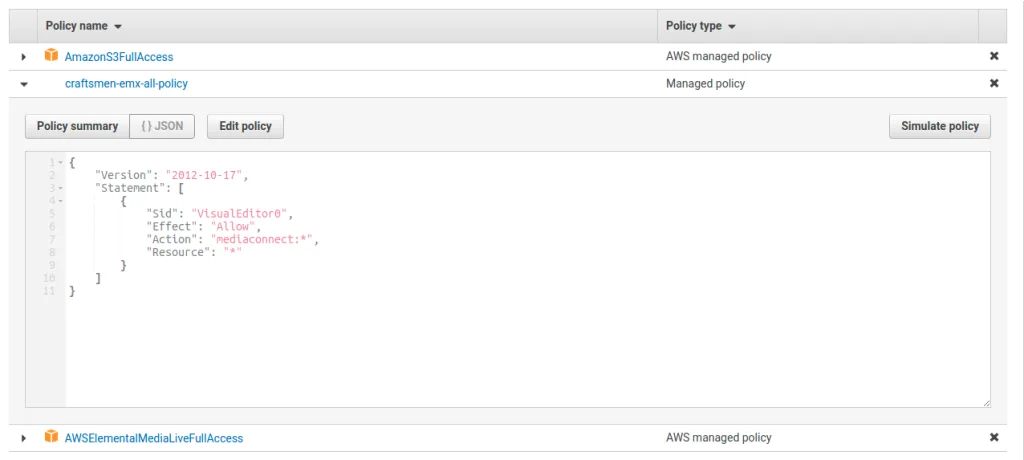
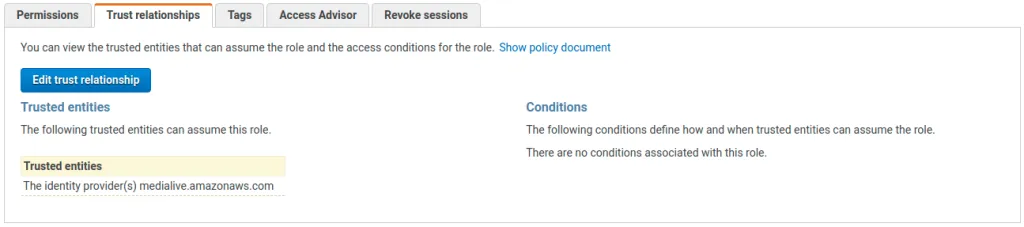
Create an IAM role with S3, MediaLive and MediaConnect full access (this just simplifies the role hunting).
IAM role policies
IAM Role Trust relationships
STEP 3
Create an s3 bucket (ex. my-bucket) and give public access to it so that we can use it publicly.
STEP 4
Now Go to MediaLive Inputs and create a new input with settings below:
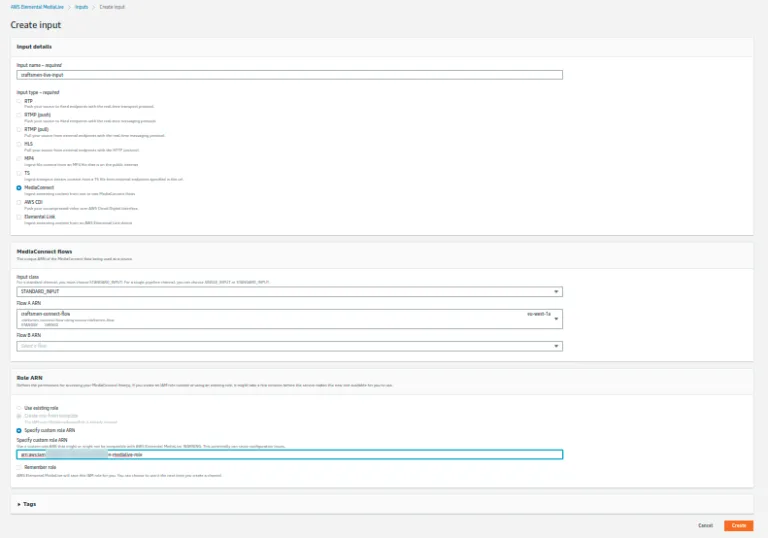
MediaLive Input Settings
We have selected input type MediaConnect and added our MediaConnect Flow and the IAM role in this MediaLive input.
STEP 5
After creating MediaLive input we will create a MediaLive channel. Attaching the input we have created earlier and the IAM role.
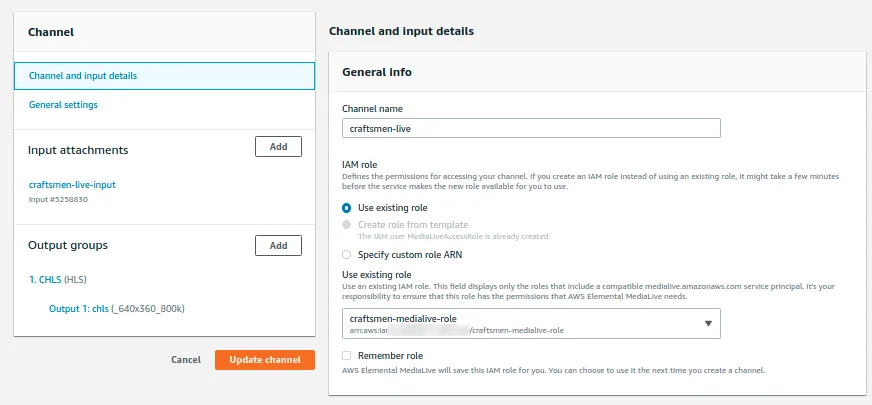
MediaLive Channel Setting
For this demo we will be using SINGLE_PIPELINE.
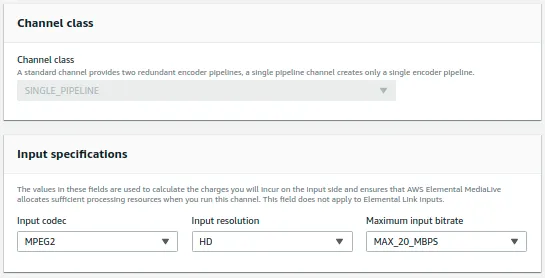
MediaLive Channel Setting
Now add Output groups
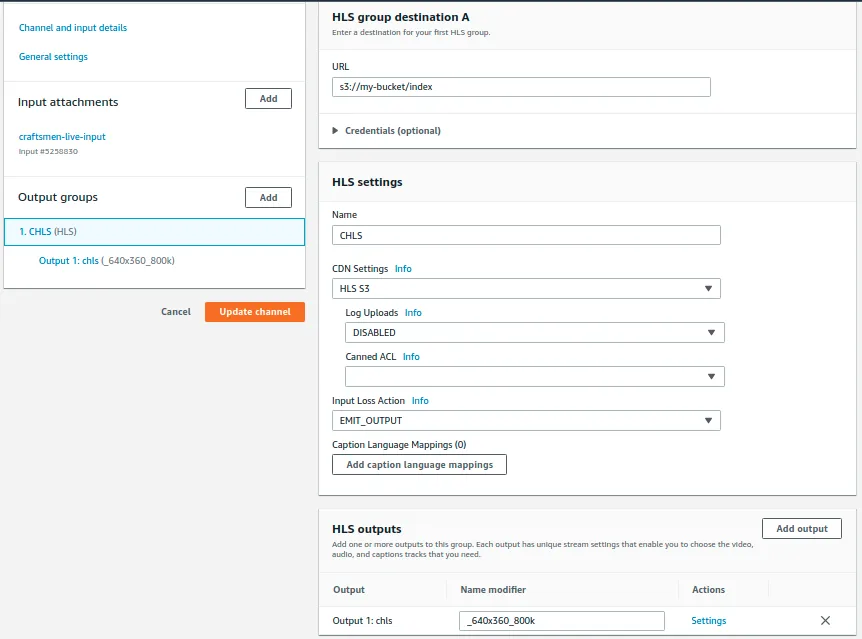
MediaLive Channel Output Group Setting
We have selected HLS output. As destination url we have used our newly created s3 bucket and we want our MediaLive output file named as index.
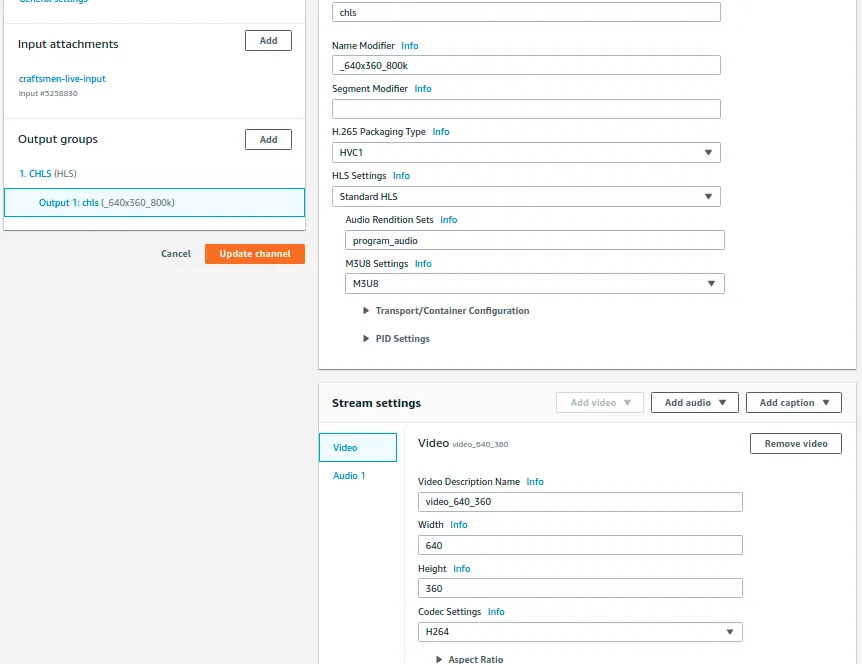
MediaLive Channel Output Setting
Now if we go to our MediaConnect and check output we will find a MediaLive output connected to our flow.

MediaConnect Output
STEP 6
We need a sample video file we want to use and download FFmpeg on our local machine.
To download FFmpeg: wget https://johnvansickle.com/ffmpeg/builds/ffmpeg-git-amd64-static.tar.xz
Unzip the FFmpeg folder and use command ./ffmpeg -stream_loop -1 -i in terminal.
Example: ./ffmpeg -stream_loop -1 -i /home/user/Downloads/test_video_file.mp4 -f mpegts srt://52.18.155.2:5555
We are using -stream_loop cause our sample video file too short so we are looping our file for continuous stream and since we declared SRT listener in MediaConnect we are using srt://52.18.155.2:5555
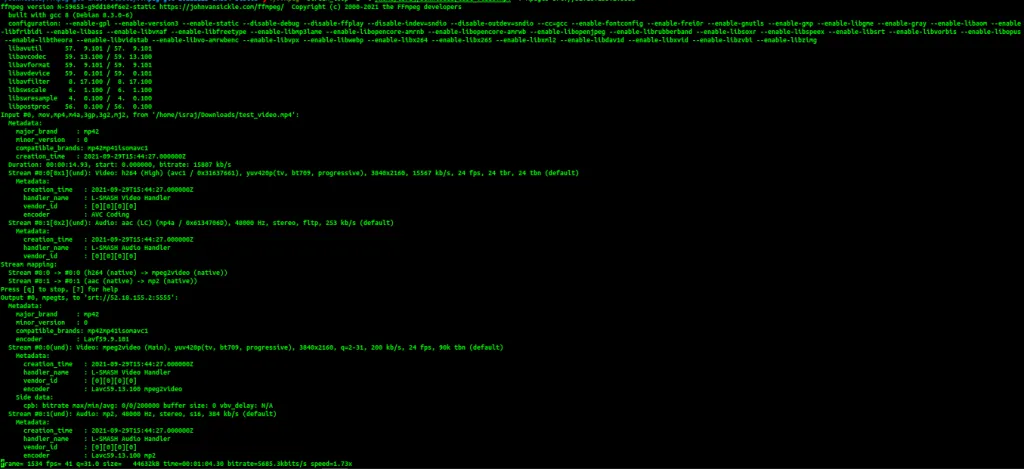
After running FFmpeg command in terminal
Note: Make sure you have started MediConnect and MediaLive and both are running.
We will see something like this in MediaConnect
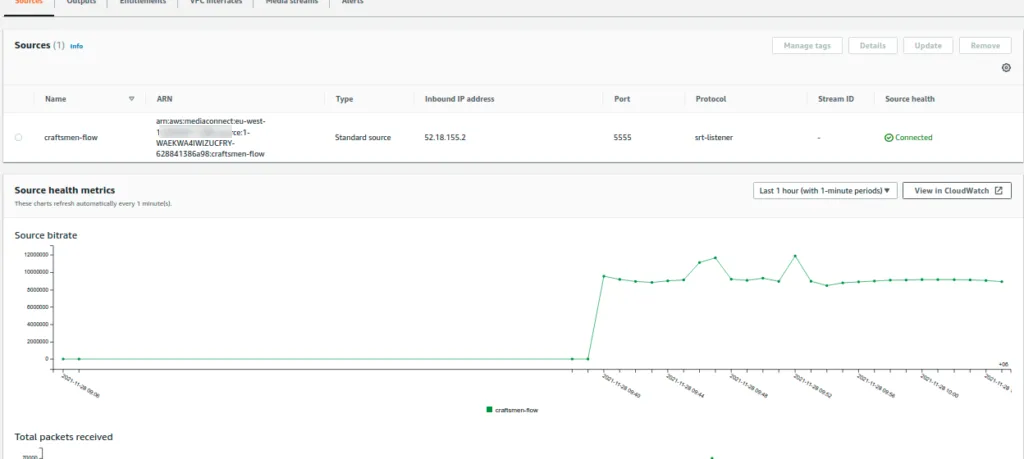
In MediaLive

And in s3 bucket
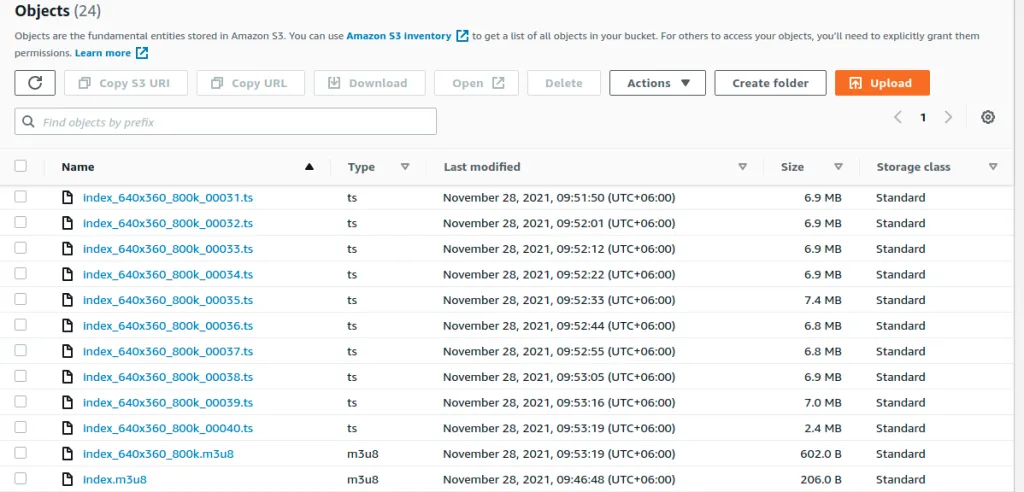
We will see an index.m3u8 file, it’s a playlist file generated by Medialive in our s3 bucket. Now if we copy the object url of this m3u8 file and start a network stream in our VLC player.
TADAAAAAAAAA………
Thank you for reading!
Let’s show you a fun trick by adding a logo in live streaming-
Upload a logo in the bucket and copy the object url then follow the steps.
Got to MediaLive channel and select schedule
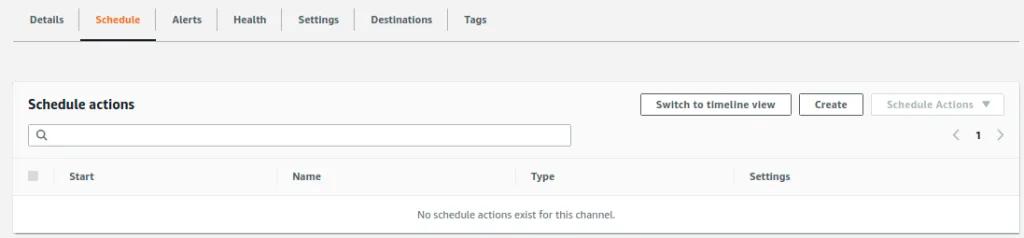
Select settings below, add the logo url and create
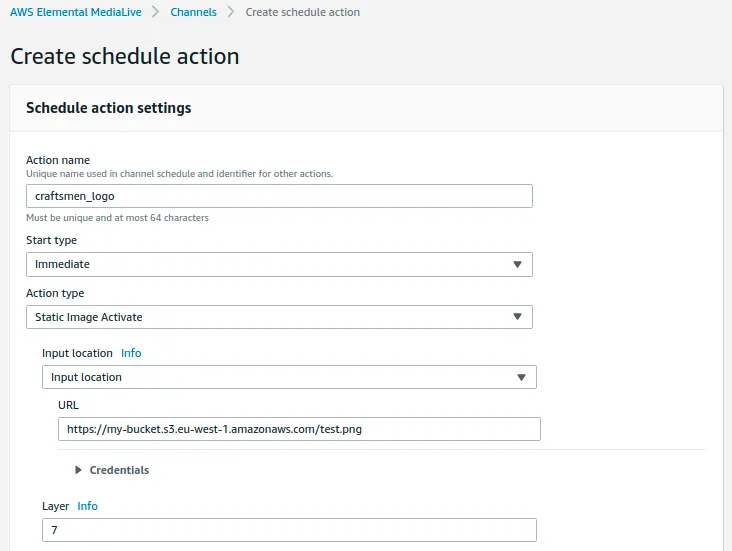
MediaLive Schedule Settings
Here we go!
Video Streaming with Logo.
Special Thanks to Sakibul Alam for contributing and sharing AWS Media Service related knowledge.
You are on the list
The next letter goes out at the start of the month.