
In one of my previous articles, I have discussed why Vite is faster and how you can start a new project with Vite.
Today I will be focusing on how you can migrate your existing react project created with create-react-app.
If you already have an existing react project, then it is a bit complicated process to move to Vite. Don’t get confused with the steps necessary. I will try my best to describe the steps one by one.
First of all, delete the node_modules folder of your project because we will be configuring the package.json file for Vite.
Mandatory Steps
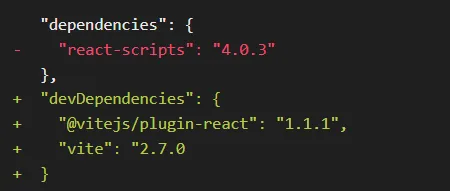
The first step is to remove all the react-script dependencies from the package.json file and add vite. Note that, the version of the packages may change with time. It is recommended to always use the latest version.
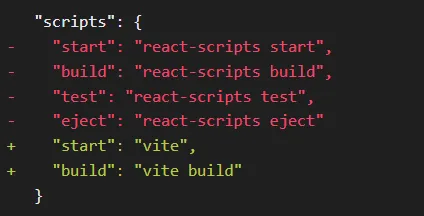
Run npm install or yarn. Replace scripts in package.json.
Move public/index.html to index.html (project root folder). This is necessary. Otherwise, Vite will not work.
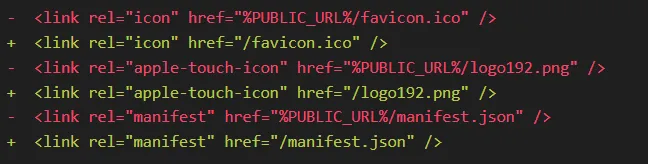
Now we need to edit the index.html file and make some modifications there. First of all, remove all the %PUBLIC_URL% from index.html:
Add entry point in index.html:

If you are using typescript, then use your typescript entry point (i.e. /src/index.tsx).
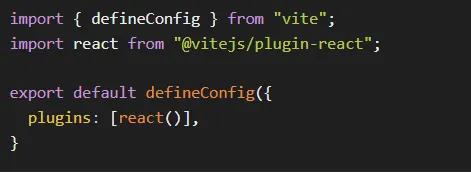
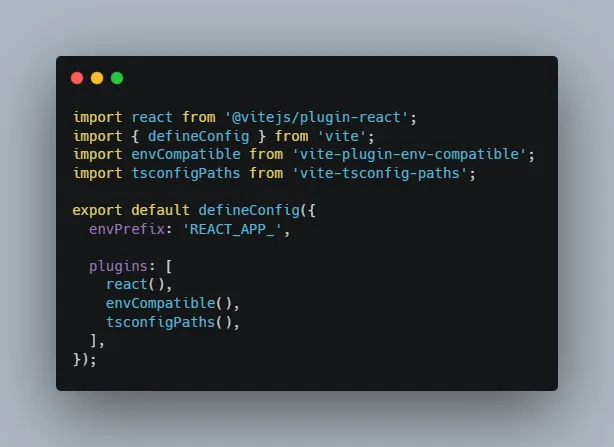
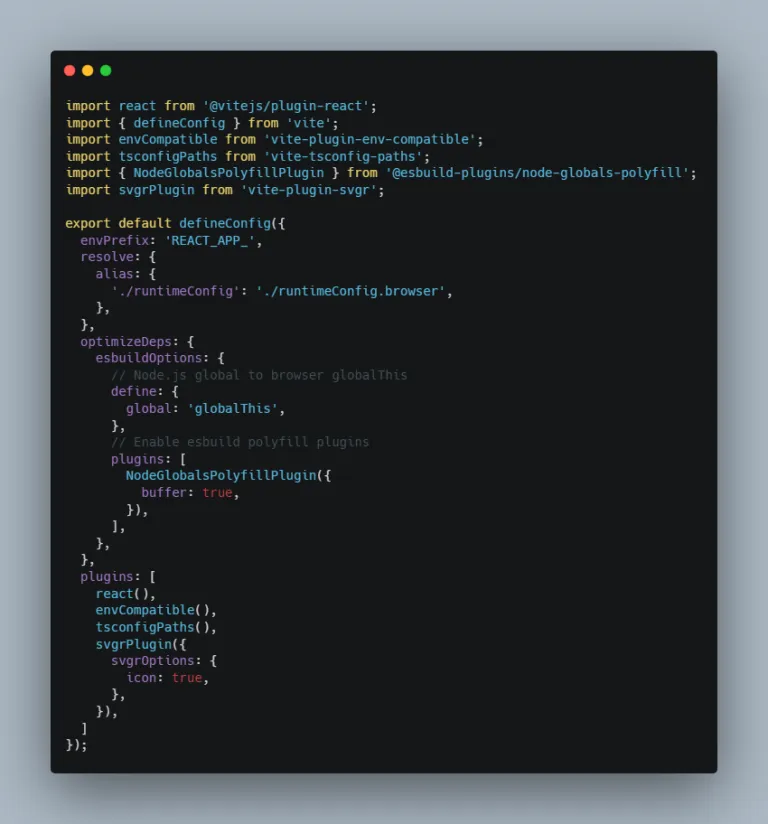
Next step to create a vite.config.js or vite.config.ts file at the root of your project. The file should look like this:
Go to your src folder, create a new file vite-env.d.ts and add this line to the file: /// <referencetypes=”vite/client” /> (You have to add ///)
If your project is small enough, there is a possibility that these are the only steps that you need to follow. But there are more things to be configured for big projects.
Handling environment variables
Let’s assume this is your .env file:
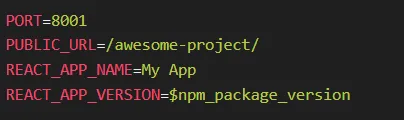
In vite, by default, all the environment variables start with VITE_. So all the environment variables that start with REACT_APP_ are needed to be replaced with VITE_.
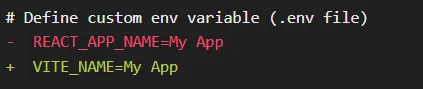
This means you might need to change all your environment variables which may be a bit painful. This is where another plugin comes into play called vite-plugin-env-compatible. Run the command npm i vite-plugin-env-compatible or yarn add vite-plugin-env-compatible. Then add the following to your vite.config.js or vite.config.ts file.
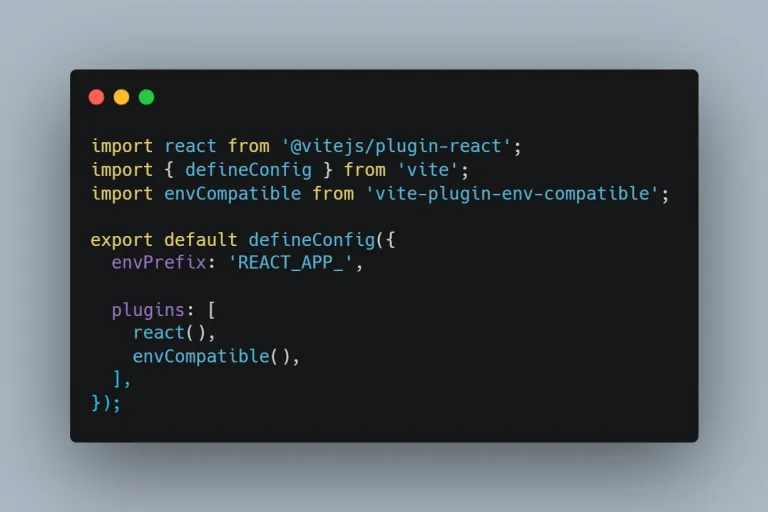
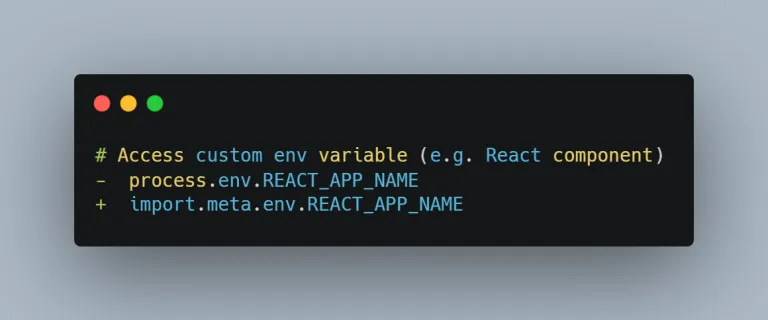
The envPrefix tells vite what should be the staring of every env variable. Thus you don’t need to change any of the env variable name. But you have to do one thing for sure. Wherever you used process.env, you have to change it to import.meta.env. This can be easily done by searching in the vscode and replacing it.
Additional Configuration
If you are using typescript, then you definitely have one tsconfig file where you might have configured your path aliases. In vite, in order for tsconfig paths to work, you need to install vite-tsconfig-paths using npm or yarn. Then you have to add this plugin to your vite config file.
There is a possibility that you may use aws-amplify package in your project in order to use cognito authentication. This may not work out of the box. You have to edit the vite config file and add one extra line for aws-amplify to work.
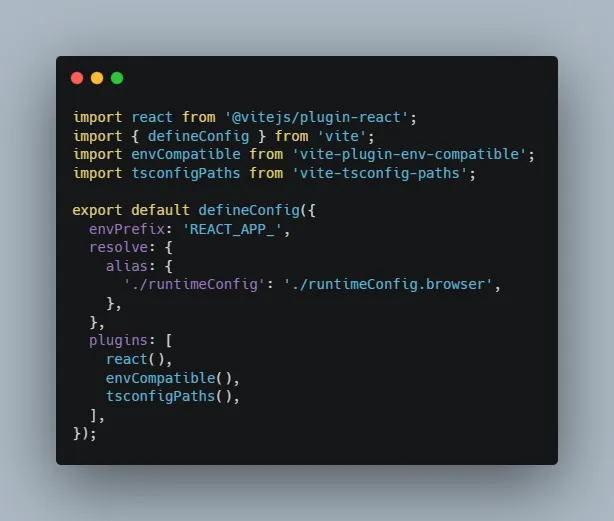
This './runtimeConfig': './runtimeConfig.browser' will make sure that aws-amplify is running smoothly in your project.
Sometimes you may use one or more package that uses Node.js built-in and globals. In vite, build in and globals will not work out of the box. You have to do some configuration in vite config file as well as in the index.html file. Let’s first configure it in vite config file. First you have to install @esbuild-plugins/node-globals-polyfill plugin using npm or yarn. Then add this to the vite config file.
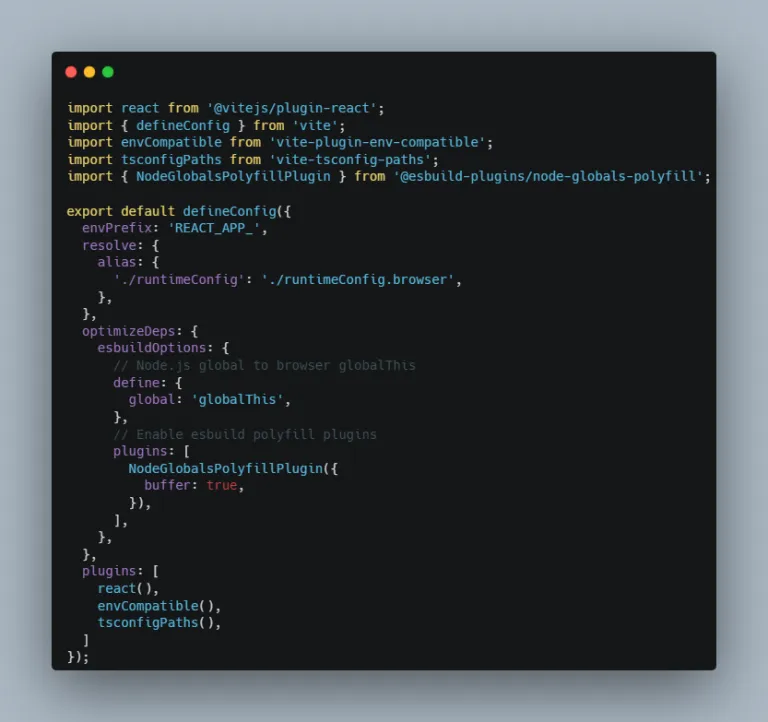
Then add the following lines into your index.html file inside the script tag.
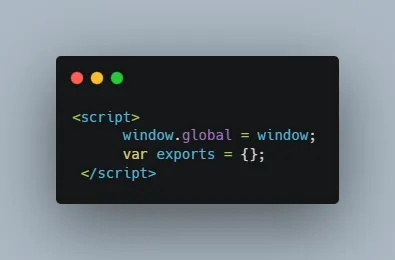
These two steps will make sure that global works anywhere in your project.
Lastly, there is possibility that you are using svg files in your project. And in react you can import svg files as react component by using import {ReactComponent as logo} from 'your-svg-path'. This will throw an error in vite. To fix this you have to install vite-plugin-svgr using npm or yarn then add it to your vite config file.
Then you have to go to your src folder, and edit vite-env.d.ts file and add another line: /// <referencetypes=”vite-plugin-svgr/client” /> (You have to add ///). After that import {ReactComponent as logo} from 'your-svg-path' this import will work perfectly fine.
This is how you can move to Vite in your existing project. The process might take a bit long time and some digging, but once you have moved to vite, you will be saving a lot of times every time you run your dev server and build files for your production server. Here is a comparison of mine how fast I got using Vite:
| Dev server in create react app | Dev server in Vite |
|---|---|
| 53 seconds | 7 seconds |
You can easily see how much faster I got when I switched to vite. I hope this article might help you to migrate to Vite as well.
You are on the list
The next letter goes out at the start of the month.